Installing a Mixer With Your Own Hands in the Bathroom: Easy Tips

Long gone are the days when plumbing was not only a device for its intended use. Modern mixers, showers and other equipment not only perfectly fulfill their duties but also delight our eye with grace and originality.
Today on the selves of hardware stores, there is really a wide selection of all kinds of mixers. Here we will tell you what it is like to install a mixer in a bath with your own hands, how to install the mixer correctly, you will get acquainted with useful tips for installing this unit with your own hands.
How to choose a bath mixer?
The mixer can’t be installed without purchasing a new tap. You should take it very seriously when buying it, because the whole subsequent operation of the mixer depends on its quality, so do not save on buying quality taps.
Before proceeding with the installation of the mixer, it must be selected correctly. When buying, pay attention to the following:
- The mass of the structure, because the quality of the model directly depends on the weight. If the material is of high quality and durable, it will not be light, since the thickness of the metal is a guarantee of quality.
- Construction material. Professional plumbers use a tempering valve of either brass or silumin which is lightweight and made up of an aluminum and silicon alloy and is not strong enough, sometimes the handle of a mixer made of such material can come off or the clamps can fall off. But brass devices are more expensive, but the binding of alloys on them is higher, so the device will not break.
- Technical specifications. If you are going to change the faucet yourself, carefully study its characteristics so that they correspond to the location in your bathroom.
The sequence of work on the installation of the mixer
Before installing a new mixer, first remove the old one. For this and subsequent work, you will need the following tools:
- hexagons:
- large pliers;
- tap spindle;
- Phillips and flat screwdriver;
- gas and open-end wrenches;
- adjustable wrenches;
- FUM tape.
How to remove an old mixer with your own hands?
- Removing a bathtub faucet or old tap on your own is not a difficult task, but be sure to shut off the water supply before doing it.
- It is necessary not only to shut off the main line, but also hot water, which in some apartments and houses is supplied through a gas water heater or boiler. Replacement is done in the bathroom itself, where the walls are tiled.
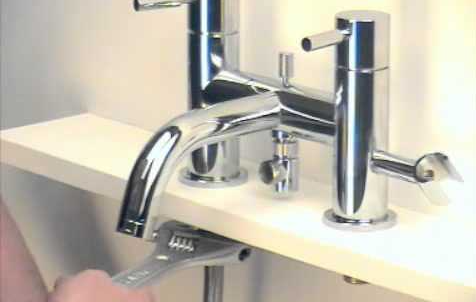
- First, drain the water from the tap, and then unscrew it from the wall , but very carefully so as not to damage the threads on the fitting, which are on the wall itself. If it is damaged, then you will have to make major repairs in the bathroom in order to change the fitting.
- After you remove the old faucet, gently clean the fitting in the wall to remove any paint residue and old tape from there.
- Wrap the cams with FUM tape, then carefully insert them into the wall fittings left over from the old tap. If there is no tape, then take a winding tow and add Unipack paste to it.
- Screw in the eccentrics, observing the distance between the inputs on the mixer 150 mm using a spirit level.
- Screw the main unit onto the eccentrics. They are installed correctly if the block is screwed on both sides without problems. Then it is removed, and decorative shades are screwed onto the eccentrics, which should fit snugly against the wall and hide the insertion points of the mixer to the wire.
- We screw the block back, using a reel for this.
- To make the shrinkage tight, use the gaskets that are located in the clamping nuts.
- Tighten the nuts slightly with a wrench so that it creaks slightly.
- Open the main tap and hot water supply to test the mixer for operation.


